Sportsman
Sep 22, 2026

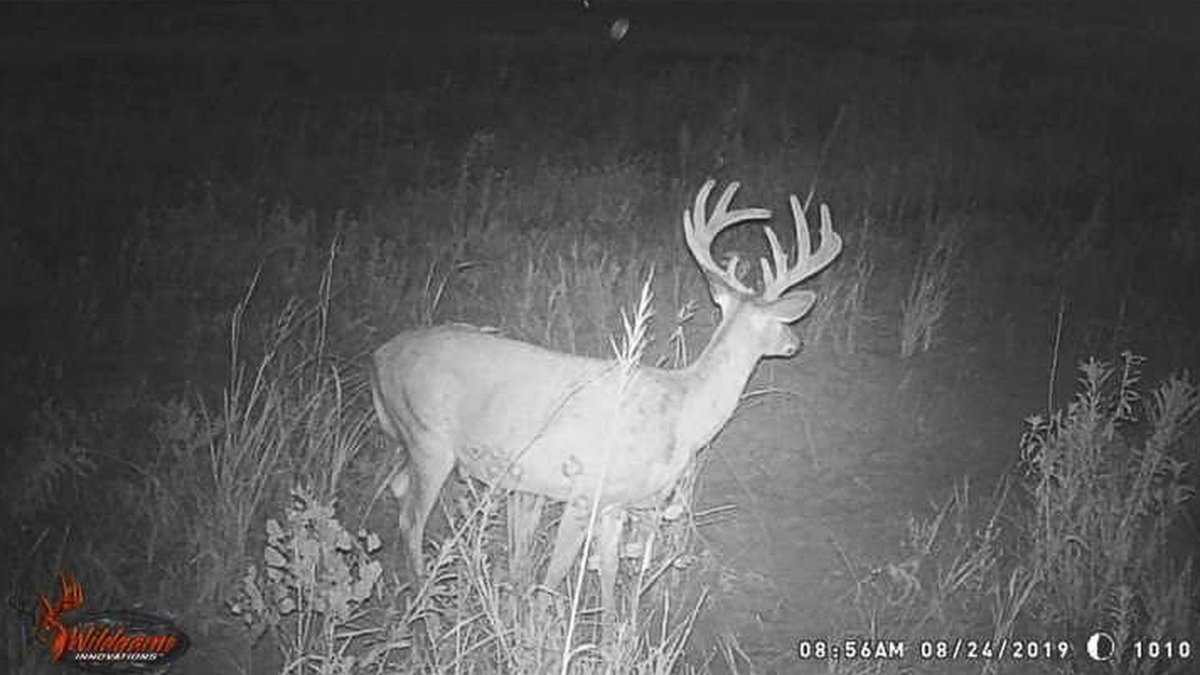
Trail cameras have changed deer hunting more than any other piece of equipment introduced in the past thirty years. What used to require hours of physical scouting — boots on the ground, disturbing the very ground you're trying to hunt — can now be accomplished remotely, quietly, and with a level of detail that pre-camera hunters couldn't access at any price. A well-placed camera on a productive travel corridor tells you not just that deer are using an area, but which deer, when they're moving, and how their patterns shift through the season.
The problem is that most hunters underuse their cameras. They hang one or two in obvious locations, check them on whatever schedule feels convenient, and interpret the images without a framework for what they're actually looking at. Getting genuinely useful information out of a trail camera network requires understanding what to look for, where to put cameras, when to check them, and how to act on what you find without destroying the patterns you're trying to document.
Camera placement is where most hunters make their first and biggest mistake. The instinct is to put cameras on food sources — field edges, food plots, feeders — where you know deer will be. That's not wrong, but it's not the most valuable information you can collect. Deer at a food source tell you that deer are using the food source. They don't tell you where those deer are bedding, which routes they're using to reach the food, or how to intercept them during daylight hours when they're moving between bedding and feeding areas.
The most valuable camera locations are on travel corridors — the pinch points, funnel areas, and transition zones that deer use to move between bedding cover and food. A fence crossing in a creek bottom. A saddle between two ridges. A gap in a hedgerow connecting two fields. These are the locations where deer concentrate their movement, where their patterns are most predictable, and where a well-placed stand has the best chance of producing a daylight encounter.
Secondary camera locations worth prioritizing are scrapes and rub lines during the pre-rut period. Active scrapes are communication points that multiple bucks visit and revisit, and a camera positioned on a primary scrape from October through mid-November can document every mature buck using that area without requiring a single human intrusion into the hunting zone. A rub line that connects two known areas tells you direction of travel and gives you a stand location option that pre-camera hunters would have had to discover by spending time in the woods.
On private land, where you know the property layout and aren't competing with other hunters for information, you can build a camera network that covers the full picture — bedding area edges, travel corridors, and food sources simultaneously — and watch deer patterns develop in real time rather than guessing. When you book a private deer hunting property on LandTrust, some landowners share trail camera data with guests before their hunt, giving you pattern information before you ever set foot on the property.
The answer depends on your property size and your management goals, but most hunters are either under-cameraed or have their cameras in the wrong places. On a two-hundred-acre property with a mix of bedding cover and food sources, four to six cameras covering key pinch points and food sources gives you enough information to make informed hunting decisions without over-saturating the property with human scent from excessive camera checks.
The temptation when you have access to multiple cameras is to cover everything — every trail, every crossing, every food source. Resist it. More cameras mean more intrusions to check them, more scent introduction, and more noise in the data that obscures the signal you're actually looking for. Focus your cameras on the locations where the information is most actionable — the spots where what you learn directly determines where you hang a stand and when you hunt it.
Cellular cameras have changed the camera check equation significantly. A cellular unit like the Tactacam Reveal series transmits images directly to your phone the moment they're captured, eliminating the need to physically visit the camera location to pull cards. For private land hunters trying to minimize property intrusion during the season, a cellular camera network that lets you monitor deer activity from your couch is one of the most impactful scouting tools available. You know when deer are using a location without alerting them that you know — and you can make hunt decisions based on current activity rather than a two-week-old card pull.
Tactacam has become the standard in cellular trail cameras for a reason. The image quality, transmission reliability, and app experience make them the practical choice for hunters who want real-time data without the card-pull intrusion. LandTrust hunters who are setting up cameras on private properties before their booked hunts consistently find cellular cameras worth the premium over standard units.
Card-pull timing is one of the most underappreciated aspects of trail camera strategy. Every time you walk to a camera location, you're introducing human scent, potentially bumping deer that are using the area, and alerting mature bucks to your presence in a zone you're trying to keep undisturbed. Poor card-pull strategy can educate the deer you're trying to pattern faster than anything you do in the field.
The best time to check cameras in the core of your hunting area is during midday when deer are bedded — typically between ten AM and two PM when deer movement is at its lowest point. Wind direction matters on card pulls exactly as it does on stand sits. Checking a camera in a bedding area from the wrong direction on a calm morning can ruin that location for weeks.
If you're running cellular cameras, the card pull problem disappears entirely for the data collection side of the equation. You still need to physically access the camera to change batteries and confirm it's functioning, but those maintenance visits are far less frequent than weekly card pulls and can be timed for maximum weather advantage.
Pre-season camera strategy differs from in-season strategy in important ways. In July and August, when bucks are in summer feeding patterns and their home ranges are smaller and more predictable, you can be more aggressive about camera placement and more frequent about checks without the disruption penalty that in-season intrusion carries. Late summer is the right time to inventory what bucks are using the property, establish a baseline of which deer you're targeting, and identify the food sources and travel routes that will matter once velvet comes off and fall patterns begin to develop.
A trail camera is only as useful as your ability to interpret what it captures. The timestamp data is as valuable as the image — a mature buck consistently appearing at 11 PM tells you something very different about his huntability than a buck appearing at 6:15 AM. Time patterns, combined with weather data from that same period, tell you what conditions are triggering movement and what conditions are suppressing it.
Moon phase data shows up in some camera firmware and correlates meaningfully with movement patterns in the way that serious hunters have debated for decades. Temperature drops, barometric pressure changes, and wind shifts all influence when deer move, and overlaying your camera data with weather records from the same dates builds a picture of what conditions produce daylight movement on your specific property.
Buck identification across cameras is one of the most valuable skills a trail camera hunter can develop. Learning to identify individual deer by their specific rack characteristics — tine length ratios, beam width, unique points, or mass at specific locations — lets you track individual animals across your camera network and understand their home range, movement corridors, and the conditions that bring them in front of your cameras during huntable hours.
On private land where you control the hunting pressure, you can build this identification database across multiple seasons. A buck you first documented as a two-and-a-half-year-old on camera becomes a known entity as a three-and-a-half and four-and-a-half-year-old. You know his patterns, his favored routes, and his responses to different weather conditions in a way that public land hunting never allows because the animal would have been harvested long before reaching maturity.
The point of a trail camera network is to make better hunting decisions — specifically, to be in the right stand at the right time rather than hunting the most convenient location on the most available day. A camera showing a mature buck hitting a scrape consistently between four and five PM on northwest wind days tells you exactly when and where to hunt. That information is only useful if you act on it correctly rather than overriding it with the instinct to go out on whatever days you have available regardless of conditions.
The discipline to wait for the right conditions based on camera data is the dividing line between hunters who consistently have encounters with mature deer and hunters who see mature deer only by accident. Private land access helps with this discipline because you're not competing with other hunters for stand locations or feeling pressure to get out every possible day to beat other parties to the good spots.
The camera tells you the pattern. The conditions tell you when to hunt it. Private land access gives you the ability to execute on that information without pressure or competition. Those three elements working together is what produces consistent results on mature deer — not luck, not the right caliber, and not hunting harder. Hunting smarter with better information on the right ground.
Browse private deer hunting properties on LandTrust and find land where your trail camera setup can tell the full story before the season opens.